Introduction
Plant nutrition is a major factor influencing growth, physiological function, crop production, and quality. Ignoring grapevine nutrition can lead to reduced grape yield and quality over time. However, because grapevines are perennial plants that live (hopefully) for many decades, the nutrient requirements are not always straightforward. Therefore, monitoring vine nutrient status is crucial to maintain optimal grapevine health and fruit quality for both bunch and muscadine grapes.
Soil testing alone is not a precise indicator of vine nutrient status because soil tests will tell you what nutrients might be available to the plants at the time of sampling, but not what the plant is actually using (Skinkis & Schreiner, 2018; Wolf, 2008). Plant tissue analysis is generally more reliable for predicting a vine’s current nutrient status (Dami & Smith, 2019; Skinkis & Schreiner, 2018).
Tissue analysis serves three purposes: determining the vine’s current nutrient status, identifying potential deficient or excessive nutrients that may signal approaching problems, and monitoring plant responses to fertilizer applications (Skinkis & Schreiner, 2018; Wolf, 2008). The results of tissue tests can help growers better plan future fertilizer programs in vineyards. By collecting and analyzing tissue samples systematically, growers can use tissue test results as a valuable tool to manage vine nutrition and prevent potential future nutrition-related problems.
| Primary macronutrients† | Secondary macronutrients† | Micronutrients†† |
|---|---|---|
| Nitrogen (N) | Calcium (Ca) | Boron (B) |
| Phosphorus (P) | Magnesium (Mg) | Chlorine (Cl) |
| Potassium (K) | Sulfur (S) | Manganese (Mn) |
| Iron (Fe) | ||
| Nickel (Ni) | ||
| Copper (Cu) | ||
| Zinc (Zn) | ||
| Molybdenum (Mo) | ||
| † Primary and secondary macronutrients are required in large to moderate amounts because each has a role in fundamental plant growth and structure. †† Micronutrients are required in much smaller amounts, and usually are available in the soil to support vital metabolic processes. |
||
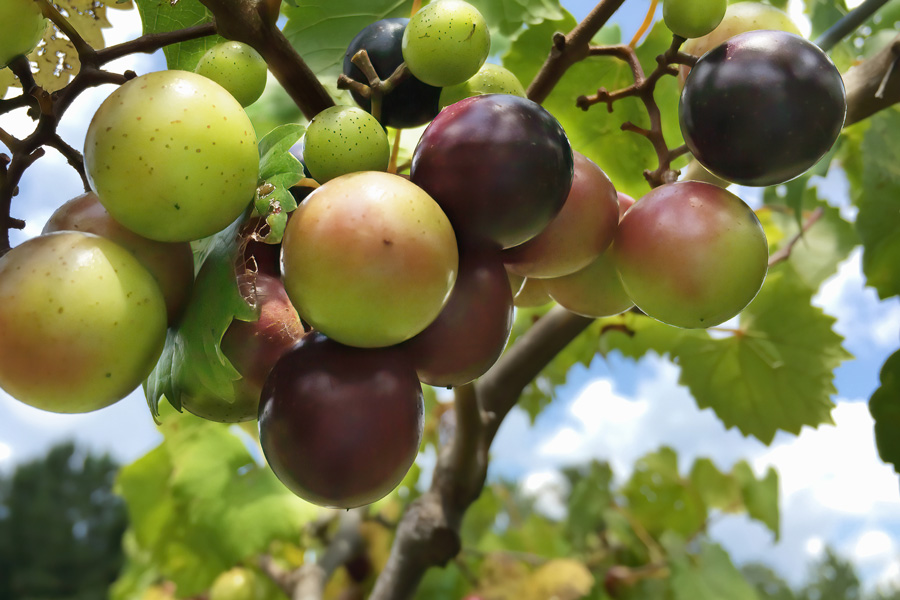
Which Tissue to Sample
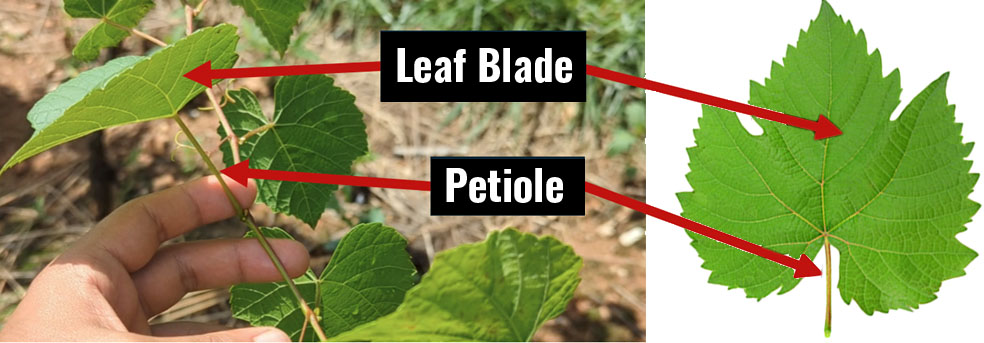
Petiole (the stem connecting leaf blades to shoots) and/or leaf blade samples (see Figure 1 for visual reference) are commonly used for nutrient analysis in grapevines (Schreiner & Scagel, 2017). Which tissue better reflects a vine’s nutrient status is still up for debate. Leaf blade analysis is preferred in European countries, while petiole testing has historically been more popular in the United States. Consequently, there is more U.S.-centered information for petioles (Benito et al., 2013; Hickey et al., 2021; Schreiner & Scagel, 2017). According to Schreiner and Scagel (2017), the choice of tissue also depends on the nutrient of interest. For instance, in ‘Pinot Noir’, they found that leaf blades better reflect vine responses to varying nitrogen (N) concentrations, whereas petioles better reflect vine responses to varying rates of phosphorus (P) and potassium (K), but with less precision. Petioles often are preferred for testing because they are smaller, have less chance of contamination, and are easier to decontaminate compared to leaf blades. This makes them logistically easier to collect.
Most importantly, whichever tissue you choose to sample initially should also be used for future samples. Being consistent will make comparing results between years easier, helping to track your vineyard’s nutrient trends and make informed management decisions.
When to Sample
The nutritional content of a vine normally undergoes large shifts throughout the growing season, so the time at which samples are collected can make a huge difference in the results. When sampling routinely to monitor vine health over time, always aim to collect the samples at the same growth stage of the vines. Bloom (flowering) and veraison (start of ripening; in red varieties, look for berries changing color, and in white varieties, look for berry softening) are the most preferred stages for sample collection because these times have the most reference values for nutritional diagnosis. In simpler terms, the comparisons are more accurate when samples occur at bloom and/or veraison.
Sampling at Bloom (Flowering)
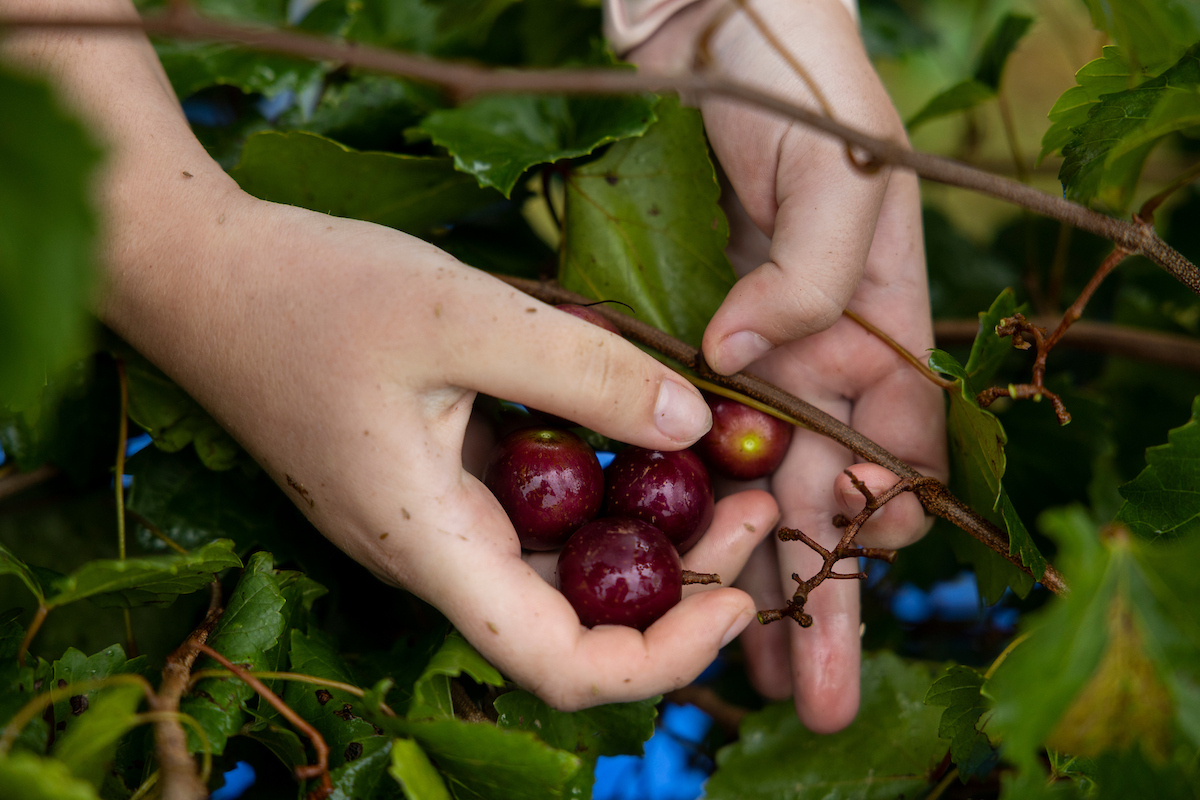
Bloom (or flowering) is when flower hoods detach from the flowers and fertilization occurs (Figure 2). The preferred timing during flowering is when about 50%–70% of flower hoods have fallen. Collect petioles or leaf blades from the leaf located directly opposite the bottom cluster.

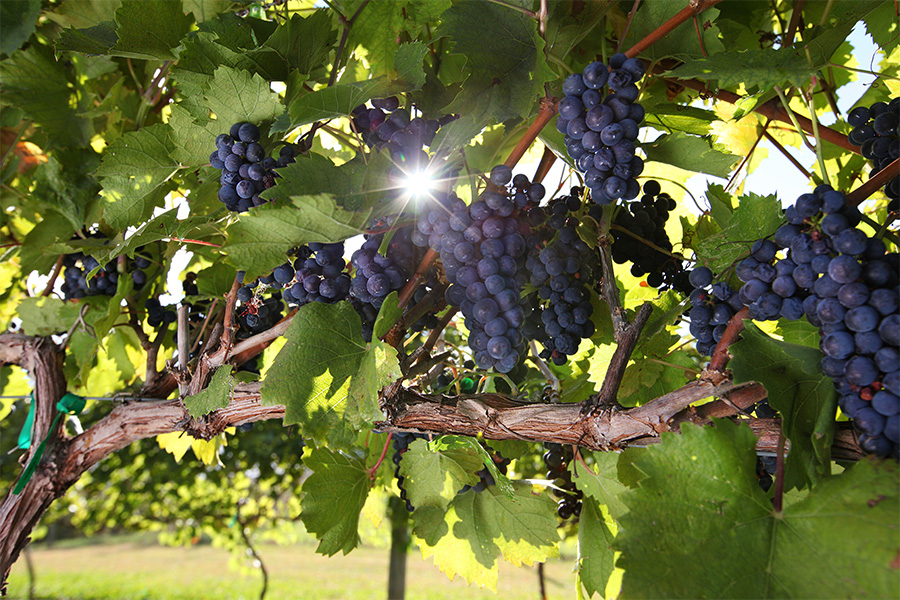
Sampling at Veraison
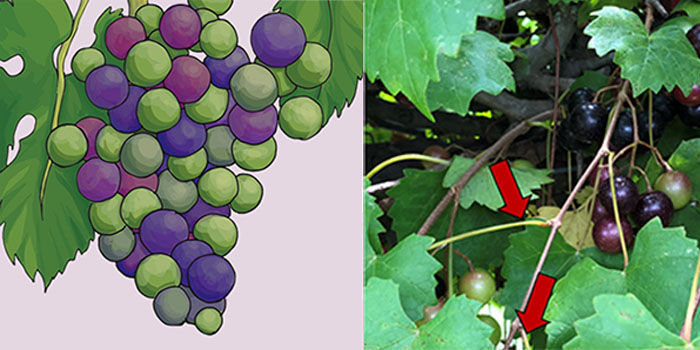
Collect petioles or leaf blades from the most recently matured leaf on fruiting canes, located five to seven leaves from the shoot tip. During veraison, the grapes are transitioning from berry growth to berry ripening. At this time, ideally target when 50% of the berries are soft (white varieties) or have changed color (red varieties; Figure 3). For hedged vines, select a fully expanded leaf near the top, at least two nodes below the cut end of the fruiting canes.
The timing of sample collection also depends on your goal and the availability of specific reference values for each phenological stage. If your goal is to predict micronutrient status, it is better to collect the sample during flowering (Benito et al., 2013; Schreiner & Scagel, 2017). However, veraison is preferred when the goal is to predict vine macronutrient status. This is because the macronutrients reach high levels at flowering and reduce from flowering to veraison as they get mobilized to the younger leaves, berries, and other parts of the vine (Schreiner & Scagel, 2017). Therefore, macronutrient deficiencies can potentially be temporarily masked at bloom.
Generally, vineyard fertilization occurs during the spring and early summer between bud break and fruit set. Fertilization after veraison can potentially disrupt vine dormancy. Additionally, it can take time between a fertilizer application and when the vine absorbs the nutrients applied. Therefore, if tissue sampling results determine that a vineyard requires nutrient adjustments, the timing of the tissue collection can make a difference as to when you should take action and when you will see the results. Sampling at flowering may allow time for nutrient adjustments within the current growing season. However, sampling at veraison means that nutrient adjustments will be made for the following season. If you are collecting the samples for the first time, consider sampling at both stages to understand the nutrient dynamics of your vines over a season.
What If Vines are Symptomatic
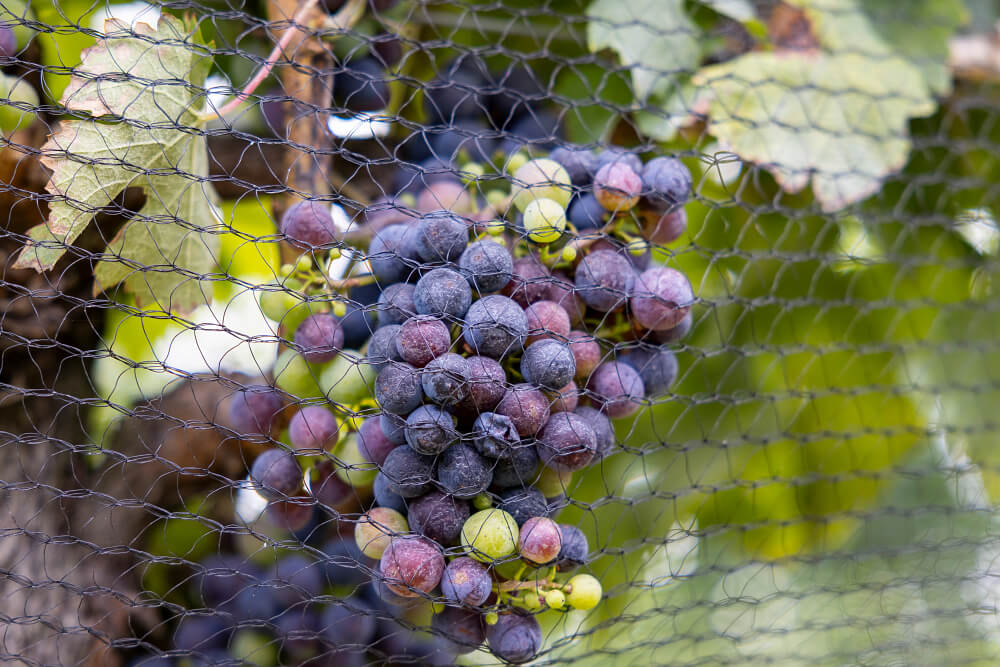
If you suspect nutrient problems in a vineyard block (for example, if one section of a vineyard shows a high rate of interveinal chlorosis and another section appears healthy), collect separate samples from symptomatic and asymptomatic vines nearby. Be sure to sample from the same relative shoot position and compare their nutrient concentrations. The comparison can help identify if the symptoms are due to nutrition and make nutrient management decisions to address them. When making comparisons, however, note that the nutrient status of vines can vary widely depending on the variety and clone, the rootstock, the soil type, the vine age, and other planting differences. Try to minimize those differences for comparing symptomatic and nonsymptomatic tissue.
One of the benefits of collecting routine tissue samples (collecting bloom and/or veraison samples every year) is that nutrient deficiencies can hopefully be addressed prior to the vines showing any symptoms that could impact fruit yield or quality or vine survival. Note that vines are more likely to show symptoms later in the season, as many of the major macronutrients decrease in overall vine content (Table 2).
| Nutrients that decrease | Stable nutrients | Nutrients that increase |
|---|---|---|
| Nitrogen | Magnesium | Calcium |
| Phosphorus | Iron | Manganese |
| Potassium | Copper | |
| Boron | ||
| From “Bunch Grape Nutrition Management,” by the Southern Region Small Fruit Consortium, 2019 (https://smallfruits.org/files/2019/06/TissueAnalysisforGrapevines.pdf). | ||
How Many Tissues to Collect per Sample
Collect at least 50 petioles or 30–50 leaf blades per sample from a vineyard block, collecting only one or two tissues per vine. The key goal here is to ensure the samples are representative of the entire vineyard block you are trying to examine. Choose leaves from shoots that are well exposed to sunlight and avoid collecting samples that are damaged by insects or disease (Hickey et al., 2021; Schreiner & Scagel, 2017; Wolf, 2008).
How Many Samples to Collect
The number of samples depends on the size and diversity of the vineyard. In general, a different sample should be collected when there is a change in variety, rootstock, soil type, elevation, and age of vines.
Additionally, the duration and timing of phenological stages vary by variety. When possible, monitor phenological stages closely and adjust timing to ensure that most varieties are as close as possible to 50% flowering or veraison. If this is not possible and all sampling is done at once, record the phenological stage during sampling to ensure that you will collect the sample at the same phenological stage in the following years. This consistency will help to compare the results over time.
Record the sampling locations for future reference as well. Developing a vineyard map will help to keep track of consistent sampling over time. If the vineyard block is large, collect samples separately based on slope, fertility, and moisture gradient. Ensure that the vines are of the same age and from similar locations within the vineyard. Avoid sampling only from the border rows and the edges of fields (Hickey et al., 2021; Klodd & Rosen, 2021).
What to Do With Collected Tissue
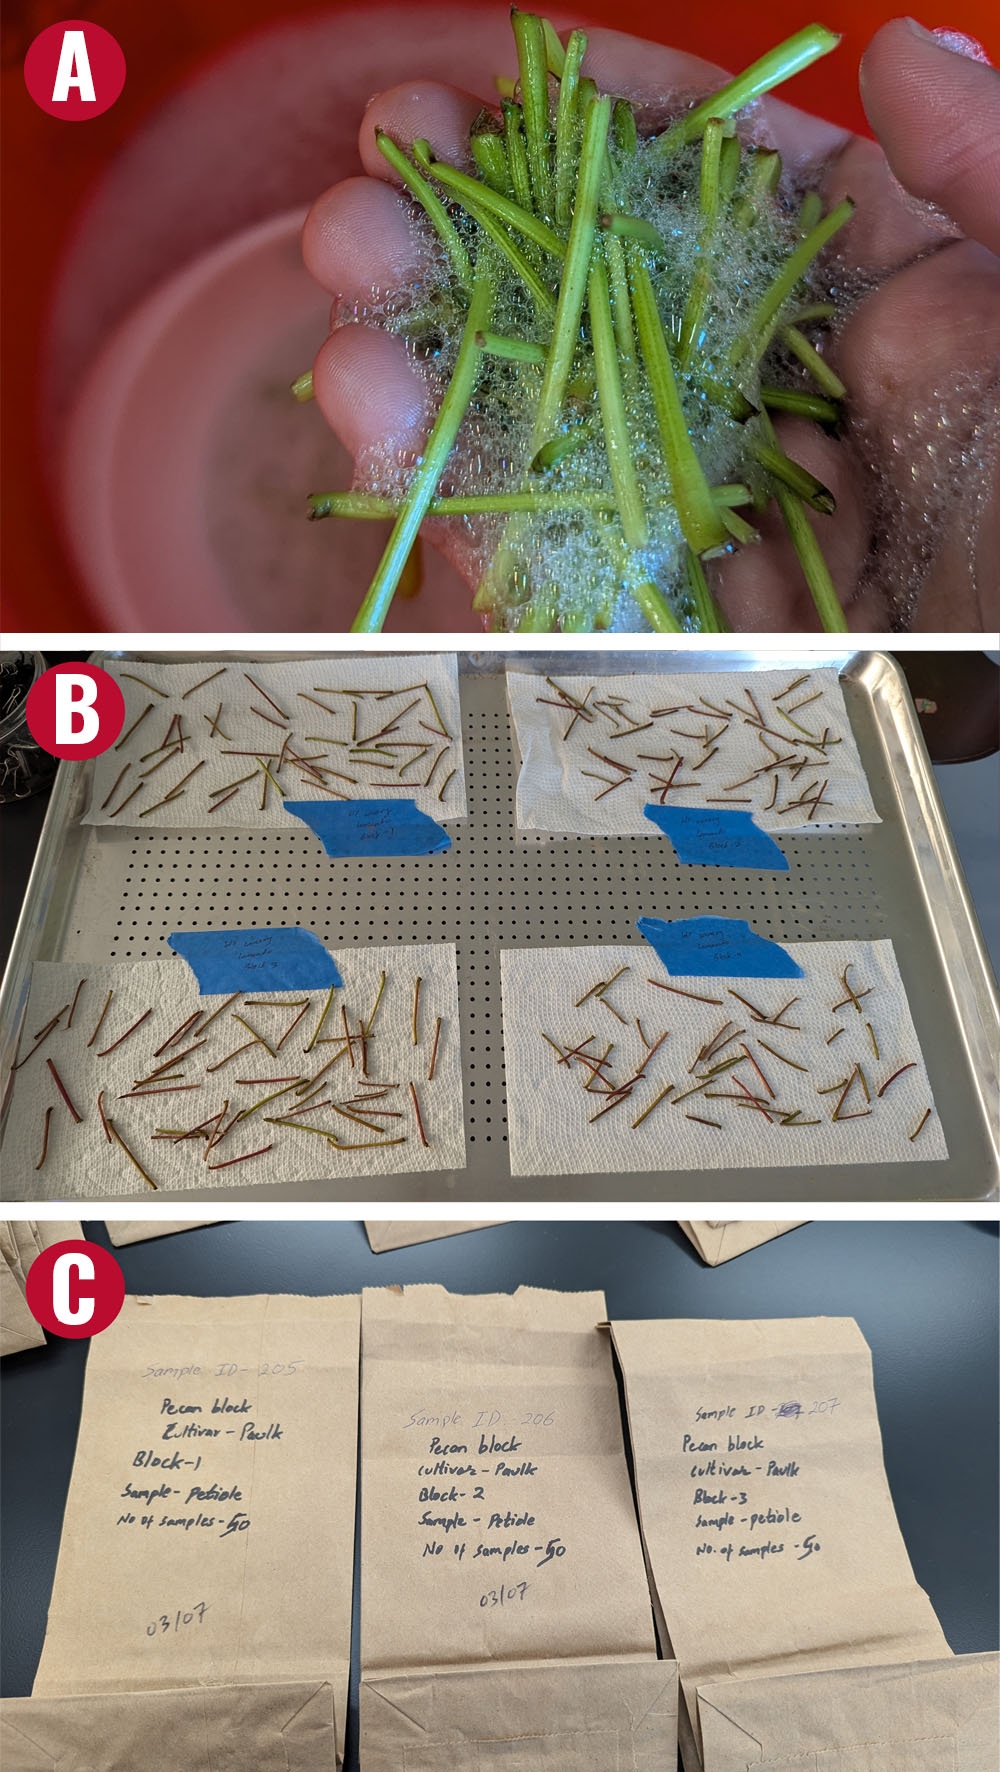
Immediately after detaching leaves from the vines, separate the petioles or leaf blades and place them in a clean paper bag for further processing. Avoid using plastic bags for sample collection, as they can trap moisture and promote fungal infection, which may alter test results. Label each sample with date of collection, vineyard location, variety name, block, and phenological stage during sample collection.
Residues of fungicides, insecticides, foliar fertilizers, and dust can serve as a source of contamination, potentially leading to inaccurately high nutrient concentrations and misleading interpretations (Scheiner & Pontasch, 2024). If the vineyard is sprayed regularly, the samples should be rinsed in phosphate-free baby laundry detergent and distilled water before submitting them to the laboratory. (See the Procedure section below for a detailed description of rinsing instructions.)
You can submit samples to the University of Georgia’s Agricultural and Environmental Services Laboratories through your county Extension office. Contact your county Extension office for assistance with submission and consultation. Additionally, there are many labs that can process these tissues. A list of potential options, along with additional resources, can be found below.
Procedure for Grapevine Tissue Sampling
Materials Needed
Vineyard map, marker, pruner, paper bags, phosphate-free baby laundry detergent, distilled water, bucket, paper towels, oven (optional).
Sampling at Bloom (Flowering)
- Collect samples when about 50%-70% of flower hoods have fallen.
- Collect samples from the leaf located directly opposite the bottom cluster on the fruiting canes.
- Avoid sampling from lateral shoots.
Sampling at Veraison
- Collect samples from the most recently matured leaf on fruiting canes, located five to seven leaves from the shoot tip.
- For hedged vines, select a fully expanded leaf near the top, at least two nodes below the cut end of the fruiting canes.
Tissue Sampling Procedure
Note: There are several laboratories that offer tissue testing services. The submission protocol may vary between laboratories. Therefore, it is best to consult the analytical laboratory where you plan to submit the samples for their recommended protocol.
- Take samples from a single block that should represent a single variety, rootstock, soil type, elevation, and age.
- If the vineyard block is large (more than 3 acres), consider further dividing the vineyard based on slope, fertility, and moisture gradient.
- If a specific area shows symptoms of potential nutrient issues, collect an additional sample from that area.
- Collect at least 50 petioles or 30–50 leaf blades per sample, collecting only one or two tissues per vine.
- Choose leaves from shoots that are well exposed to sunlight and avoid collecting samples that are damaged by insects or disease.
- Detach petioles and leaf blades immediately and place one of them in a clean paper bag for further processing (based on your preference on which one to analyze).
- Label each sample with date of collection, vineyard location, variety name, block, and phenological stage (e.g., bloom or veraison) during sample collection.
- Rinse fresh samples to remove contaminants before shipment (see below). Some laboratories may rinse the samples if requested, so it’s best to contact the analytical laboratory beforehand and ship fresh samples immediately. But avoid shipping wet samples.
- If immediate rinsing or shipment is not possible, store samples in a refrigerator in paper bags overnight and complete these tasks the next day.
Rinsing Procedure
- Rinse the samples in phosphate-free baby laundry detergent at the rate of 1/3 oz per gallon of distilled water. Gently rub individual tissues between your fingers for 30 s. Do not damage the tissues.
- After rinsing in the detergent and shaking off excess solution, rinse the samples twice in distilled water for 15 s each and blot dry with a clean paper towel.
- Spread the samples in a shaded area or at room temperature for 24 hr, or dry under a low heat (no hotter than 150 °F).
- Once dry, store the samples in a labeled paper bag and bring them to the local Extension office or ship them to the laboratory. Remember, the samples do not have to be completely dry, but must be able to avoid microbial degradation during shipment.
Procedure for Soil Sampling
Performing a soil-nutrient analysis alongside your tissue analysis allows for a comparison of soil and tissue nutrient content and availability. Soil testing is most important prior to planting a vineyard. For established vineyards, testing the soil every 2 to 3 years is adequate.
Materials Needed
Vineyard map, soil probe or trowel or shovels, sampling bags, and marker.
Soil Sampling Procedure
Note: Align the sampling location with those used for tissue sampling. This allows more direct comparisons between soil and tissue nutrient content from same block.
- Scrape the surface of grass or mulches using a trowel or shovel.
- Collect eight to 10 soil samples in zigzag pattern across the block. Mix these soil samples and place about a pint of the mixed soil into a sampling bag.
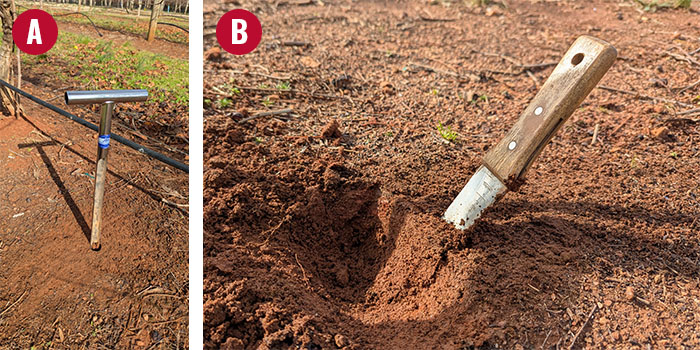
- Using a soil probe (Figure 5A):
- Push the probe to the desired depth into the soil (4-6 in.).
- Using trowel (Figure. 5B):
- In an established vineyard: Push the trowel to the depth of 4-6 in. into the soil. Make a wide opening as shown in Figure 5. Then cut a thin, uniform slice of soil from the side of the opening, extending from the surface to the bottom of the cut.
- New sites before planting: Collect a sample from 0-8 in. and from 8-16 in. deep.
- Clearly label each bag with the vineyard name, block name, and date of collection.
- Air dry the sample overnight at room temperature on a flat surface. Ensure the sample is free of contamination. After air drying, bring the samples to your local Extension office or deliver them to the lab of choice.
Potential Analytical Laboratories to Process Samples
A & L Analytical Laboratories
2790 Whitten Rd.
Memphis, TN 38133
901-213-2400
A & L Eastern Agricultural Labs, Inc.
7621 Whitepine Rd.
Richmond, VA
804-743-9401
*Agricultural and Environmental Services Laboratories
The University of Georgia
2400 College Station Rd.
Athens, GA 30602-9105
706-543-5350
Agricultural Analytical Service Lab
The Pennsylvania State University
University Park, PA 16802
814-863-6124
Plant Analysis Laboratory
Agronomic Division – NCDA
4300 Reedy Creek Dr.
Raleigh, NC 27607-6465
919-733-2655
*Southeastern Agricultural Laboratories
12986 Moultrie Hwy.
Barney, GA 31625
229-775-2426
Soil, Plant & Pest Center
5201 Marchant Drive
Nashville, TN 37211-5112
615-832-5850
Soil Testing Lab
145 Smyth Hall
Virginia Tech Blacksburg, VA 24061
703-231-6893
*Waters Agricultural Laboratories, Inc.
257 Newton Hwy.
Camilla, GA 31730-0382
229-336-7216
*Waypoint Analytical, LLC
103 Carroll Cir.
Carrollton, GA 30117
770-832-2171
*Waypoint Analytical, LLC
202 Hamilton Ave.
Bremen, GA 30110
770-832-2171
*Waypoint Analytical Outpost
2100 Abbey Ct.
Alpharetta, GA 30004
659-239-2238
*Analytical laboratories in Georgia.
References
Benito, A., Romero, I., Domínguez, N., García-Escudero, E., & Martín, I. (2013). Leaf blade and petiole analysis for nutrient diagnosis in Vitis vinifera L. cv. Garnacha tinta. Australian Journal of Grape and Wine Research, 19(2), 285-298. https://doi.org/https://doi.org/10.1111/ajgw.12022
Brannen, P., Blaauw, B., Hoffmann, M., Nita, M., & Pfeiffer, D. (2022). Viticulture management (Publication No. C 1151). University of Georgia Cooperative Extension. https://extension.uga.edu/publications/detail.html?number=C1151&title=viticulture-management
Dami, I., & Smith, M. (2019). Grapevine nutrient management: Petiole sampling and analysis. Ohio State University Extension. https://ohioline.osu.edu/factsheet/hyg-1438
Hickey, C., Breeden, S., MacAllister, C., Lessl, J., & Schreiner, P. (2021). The fundamentals of grapevine tissue sampling for nutrient analysis. PennState Extension. https://extension.psu.edu/the-fundamentals-of-grapevine-tissue-sampling-for-nutrient-analysis
Klodd, A., & Rosen, C. (2021). Tissue and soil nutrient testing for cold climate grapes. University of Minnesota Extension. https://extension.umn.edu/commercial-fruit-growing-guides/tissue-and-soil-nutrient-testing-cold-climate-grapes#how-to-sample-leaves-for-grapevine-tissue-testing-2665861
Scheiner, J., & Pontasch, F. (2024). Grapevine tissue sample preparation. Texas A&M Agrilife Extension. https://agrilifelearn.tamu.edu/s/product/grapevine-tissue-sample-preparation/01t4x000008XggSAAS
Schreiner, P., & Scagel, C. (2017). Leaf blade versus petiole nutrient tests as predictors of nitrogen, phosphorus, and potassium status of ‘Pinot Noir’ grapevines. Hortscience, 52(1), 174-184. https://doi.org/10.21273/Hortsci11405-16
Skinkis, P. A., & Schreiner, P. (2018). Monitoring vineyard nutrition. Oregon State University Extension Service. https://extension.oregonstate.edu/crop-production/wine-grapes/monitoring-vineyard-nutrition
Wolf, T. K. (2008). Wine grape production guide for eastern North America. Natural Resource, Agriculture, and Engineering Service, Cornell Cooperative Extension. https://hdl.handle.net/1813/67189